Guides for the Dryferm Bag & Accessories
The Dryferm Bag and our drying accessories are your go-to tools for your plants and your harvest. In our guides, we’ll show you how easy it is to use them for drying and care—from Dryferm Bag drying bags to the HolidayGrow water and nutrient reservoir.
Guide for the Dryferm Bag
The Revolution in Herb Drying: The Dryferm Bag makes drying your harvest easy and efficient.
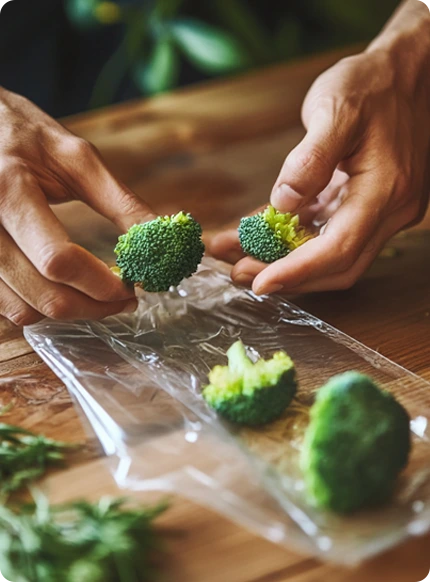
Step 1
Fill the bag
After harvesting, separate the blossoms from the stem and remove excess leaves.
Smaller resinous leaves (sugar leaves) may remain.
Distribute the flowers evenly in the bag – do not overfill to avoid moisture build-up.
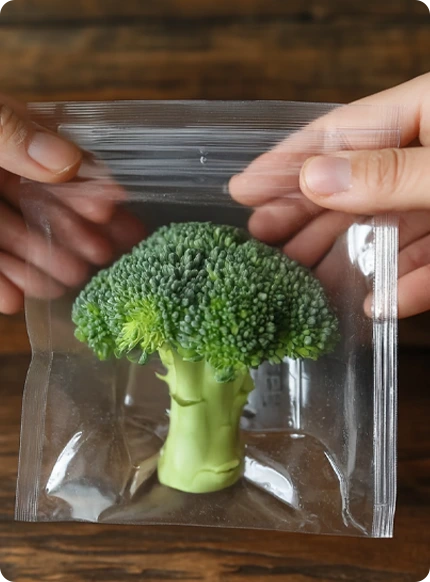
Step 2
Seal the bag airtight.
Use an impulse welding machine, clamps, or our BAG Clips .
A tight seal protects against mold, oxygen and pollutants.
The patented film technology allows moisture to escape, but blocks gases such as oxygen – thus preserving the quality.
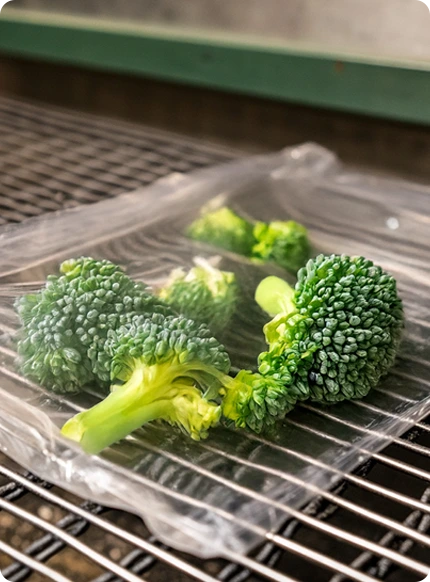
Step 3
Store in a dark, well-ventilated, and temperature-controlled place.
Ideal conditions: 18–23 °C and a maximum humidity of 45–55%.
Place the bags on wire racks or mesh so that air can circulate on all sides.
Avoid placing them directly on flat surfaces, and always store them in a dark place.
Step 4
Weigh daily
Observe the weight change – the flower loses the most moisture, especially in the first few days.
After 7–12 days the weight remains constant – then the drying process is complete.
Let the bags rest for another 2-3 days to equalize any residual moisture.
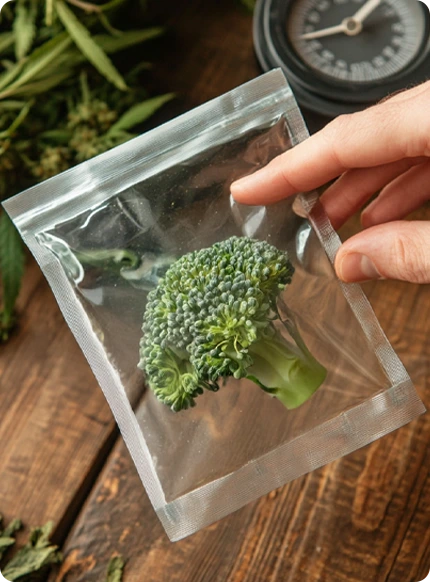
Step 5
Enjoy the result
Once the process is complete, your herbs will be dry, aromatic, and free of mold.
The active ingredients, terpenes and essential oils are optimally preserved – for the best aroma and maximum effect.

The all-in-one solution for your harvest
Curing & Storing in the Dryferm Bag
The Dryferm Bag can also be used for curing or long-term storage.
It replaces glass containers and moisture-absorbing pads—just store, monitor, and be patient.
The longer the curing period, the more intense the result. Tip: Don’t open the bag until you’re actually ready to use your herbs—this will help preserve their aroma and potency.
Guide for the Weedmaster
The stylish outer packaging and storage for the Dryferm Bags – all Dryferm Bags come with the Weedmaster.

The outer packaging of the Dryferm Bags
The Weedmaster
Robust & practical
The Weedmaster is the ideal shipping and storage solution for your Dryferm Bags. It protects against light, air, and environmental influences – and is reusable.
Heat resistant up to 150 °C
Perfect for decarboxylation: simply seal plant residues and heat them in the oven. Ideal for making butter or oil for baking and cooking.
Reusable & sustainable
Instead of ending up in the trash, the Weedmaster can be used again and again, e.g., for storage, kitchen, or accessories.
UV protection for longer freshness
The opaque special film reliably protects your harvest from UV radiation.
The result: longer shelf life, better quality, and full potency.
Guide for Bag Clips
With the Bag Clips, you can seal the Dryferm Bag simply, quickly, and completely airtight – available individually or as a set.

Guide for the HolidayGrow
HolidayGrow is THE nutrient solution for shorter watering intervals. It is suitable for hand watering and automatic systems such as Autopot, Blumat, and drip irrigation.

Step 1
Preparation of the gel
Take a clean bucket (at least 10 liters capacity). Pour the entire contents of the HolidayGrow bag into it.
Add 10 liters of clean water. Stir briefly to ensure even distribution.
Allow the granules to swell completely until a uniformly soft, jelly-like mass forms.
It's better to wait a few minutes longer (ideally 6-24h) – the slower the water is absorbed, the more uniform the gel will be.

Step 2
Prepare and mix substrate
Use soil, coco, or living soil. Add the activated gel to your substrate and mix it thoroughly until it is evenly distributed throughout.
Pay attention to the correct dosage:
- Vacation watering (maximum protection): Up to 25% gel content of the pot volume (e.g., 10 L gel to 30 L substrate, for a total of 40 L).
- Daily support (light buffer): Smaller amounts are sufficient (5-15%) to keep moisture stable and compensate for watering errors.
The gel must not lie on top, but should be distributed throughout the root zone. It must not be added or incorporated into planted pots afterwards – only before planting!

Step 3
Planting
Place your plant into the prepared substrate mixed with gel.
Gently press down on the root area to ensure good contact.
Make sure the plant stands steadily and that there are no air pockets in the substrate.

Step 4
First watering
Pour slowly and evenly until water slightly drains from the bottom.
This ensures optimal moisture distribution and allows the gel to "bind" the water.

Plant care with the HolidayGrow
Further watering and recharging
Once the plant has used up the stored water, the gel is recharged with water by normal watering.
Water slowly until a slight drainage (water runoff) occurs at the bottom. This excess water will be reabsorbed by the substrate after a short time, depending on the plant's stage of development.
You can water from both above and below. The slower you water, the better the hydrogel can re-saturate with water. If you pour water into the saucer, it will usually be completely absorbed within 1–3 days. During this time, the hydrogel has sufficient opportunity to optimally recharge.
The gel significantly extends the watering intervals. In the early phase, with cuttings or seedlings, the stored amount of water can last for several weeks. Towards the end of the flowering phase, in our tests, we only had to water about every 5–7 days.
Nevertheless, observe your plants regularly: As the leaf mass increases, so does the water requirement.
Do you have a question about any of these guides?
Feel free to send us a message!

Discover Dryferm, the revolutionary drying bag—for maximum preservation of active ingredients, minimal odor, and efficient drying.
Discover Dryferm, the revolutionary drying bag—for maximum preservation of active ingredients, minimal odor, and efficient drying.